
|
Reassemble the camera in a reverse manner. Reassembly is more difficult and takes more time.
When the camera is at its fully assembled state, carry out the necessary shutter tension / timing adjustments, lens register adjustment, and rangefinder calibration.
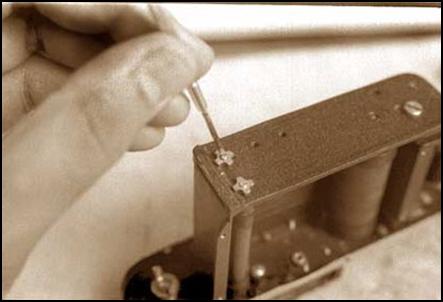
Initially tense the shutter by turning the first curtain roller’s adjusting screw. Tense it just enough to enable the roller to pull the curtain through, regardless of the camera’s position. This should take no more than four to five turns on the screw. Then tense the second roller just enough to pull it through as well, and this usually takes less, about three turns will do. The less tension required, the smoother and quieter the shutter operation will be.
Having the second curtain tensed too much will cause it to move faster and catch up with the first one, causing banding (uneven exposures) or else cap totally to make incomplete exposures. The accepted route here is to have a snappy first curtain and a rather slow second one. |
|
Tensing the first curtain’s roller. The second curtain roller is the one on the front left side of the crate. Normally, two tools are used– one to tense the spring’s screw, and another to hold the locking nut down. Sometimes, the locking nut will not keep its place so it should be held during the tensing sequence with the other hand, until the locking set screws are installed. |
|
SHUTTER ADJUSTMENT |
|
Repair expert Isaak Maizenberg’s method of checking shutter speeds is by listening to the way the shutter sounds. Anyone who has “heard” a lot of shutters before may probably be able to do the same. In time, one could develop a keen perception of how different 1/50 sounds from 1/100. Following the tensing figures given above, my reworked shutters appear to be accurate enough for negative film exposures.
Add more tension to the first curtain by giving its tensing screw a half-turn. No more than two or three turns should be given since this would tense the roller too much and can result in more noise and vibration, as well as heavier winding and shutter releasing. Or the second curtain’s tension can be reduced a bit.
Partial capping is also remedied in the same way, provided that it is due to improper tension, and not improper curtain installation. |
|
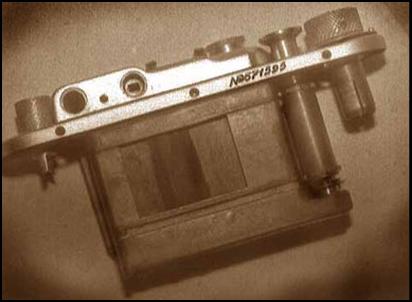
When correctly reassembled, the shutter should look like this, viewed from the back. The folded edges wrapped around the laths (curtain spines) should be visible from this side. |
|
Note: When putting the camera back together, check that all removed parts are restored to their places before proceeding with the next step! |
|
Shutter Accuracy?
Maizenberg’s method of tensing shutters have so far proven effective with my repair projects. I have no shutter testing apparatus, and getting one isn’t exactly an attractive proposition: I find the prospect of going through all my cameras and finding out how off their shutters quite terrifying. Worse would be to work on each to get them into specs. So far the cameras have been giving exposures which look correct on negative film. Occasionally though, I do find cameras which exhibit some banding. A bit of tweaking with the shutter’s tension takes care of this.
If ever testing apparatus are used, and values read off it are far from the ones marked on the camera, don’t despair. It’s usually accepted to have the measured value “close” to the marked ones. Exposure tolerances allow this. If the shutter has been tensed so that it gives an acceptable value at its top speed, all the others should follow. The shutter really runs at one velocity at all speeds– it’s the slit sizes which vary. This aspect is not adjustable with tensioning. Remember too, that measuring apparatus are not infallible. If your shutter gives you good exposures, leave it be, no matter what the tester says. |
|
! |