|
Camera Disassembly page 4 |
|
SHUTTER REPLACEMENT |
|
It is very likely that any FED or Zorki found today with its original shutter would have this torn, dried, or perforated. The shutter is made of vulcanised cloth, and as such, would be prone to damage caused by age, climate, and use. It is quite easy to replace these curtains. The exact shutter cloth material isn’t critical. Modern, thinner replacements can actually improve the camera’s performance.
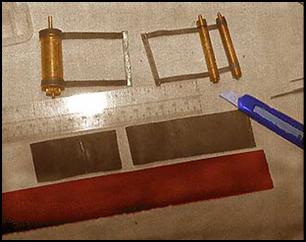
Shutter curtains which are too full of holes, or are flaking, or are dried and cracked need to be replaced. Small pinholes can be patched with black textile paint, but if the holes are too many and too large, replacement is the only solution. Even if only one curtain is damaged, it is wiser to replace both since two different materials working in the same shutter may not result in anything good. Ribbons also should be replaced when they break or fray. The shutter I use to replace the curtains in my FED and Zorki are home-made. They are lighter and thinner than the original curtains found in these cameras– averaging 0,2 to 0,.3mm thick vs the original 0,3 to 0,45 mm. Ribbons are either cut from the same material, though satin ribbons from tailors’ supplies can also be used. |
|
Before ripping the curtains out, mark the position where their edges were glued on the drum, rollers, and in the case of the ribbons, the pulleys. The position on the drum of the longer curtain is critical, as well as the long ribbons attached to the drum’s pulleys. Measure the specs of the original materials and use the same when cutting the new. |
|
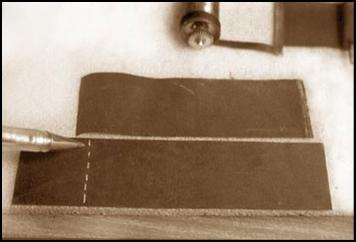
Cut new shutter cloth of the same length and width as the originals. Use the old ones as templates. Same with ribbons. Ribbons may be glued first to the pulleys/rollers/laths. |
|
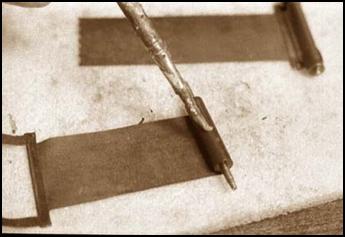
Glue the first (short) curtain first to the lath or as some call it, the spine. Originally, the curtain was sewn after being wrapped around on the lath. Later models use a crimped lath which detain the curtain’s edges. I’ve never sewn any curtain and glued everything using rubber contact cement (not rubber cement). I’ve done about a dozen glued replacements and no curtain has ever come loose yet. The curtain is folded so that its tip would be facing the film side of the shutter. The other end is glued to the first shutter roller. (continued next page) |
|
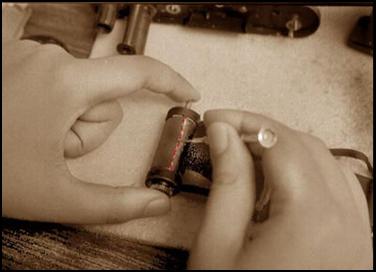
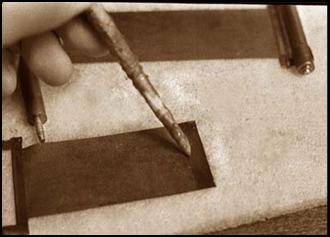
The end of the curtain is folded and glued around the lath, with this end facing the back side of the shutter (film side). The later laths can be pried open with a micro screwdriver and the old cloth pulled out. The new material is inserted, with some glue on the edge to be attached and the lath is crimped back with a pair of large pliers. Some times this method results in badly mangled lath which would be no good in sealing light out during shutter winding. My alternative solution is to thin the lath by hammering it and attach the curtain wrap-around style. The photo on the left shows such a lath getting the wrapped treatment. |
|
Rubber contact cement („Rugby Cement“, „Pliobond“) has been the favoured type of adhesive. Shellac glue was the original goo. The rubber based cements offer two advantages: strength and ease of resetting while still wet. Most strength is needed where the curtains are attached to the laths, where no sewing is done. However, it must be noted that it isn’t the glue really which gives strength to the bind of the curtains and straps to the pulleys and drums. The glue only serves to anchor the curtains and straps; it is really the coiled curtains and straps wrapped around the drum and rollers which make them stay bound. |