|
Camera Disassembly |
|
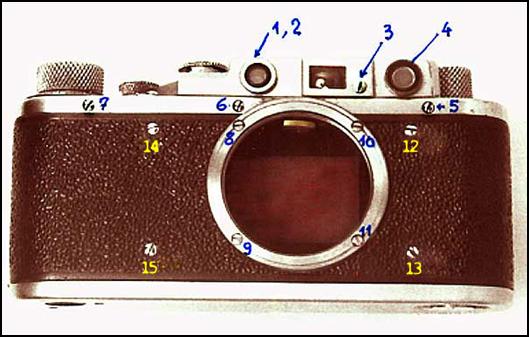
Unscrew 1 and 4 using a rubber mat or fibre wrenches. Under 1 is the optical wedge collar 2 which is loosened with a spanner. Screw 3 covers the rangefinder adjustment screw. Screws 8,9,10, and 11 holds the lens mount in place. Screws 5, 6, 7, 12, 13, 14, and 15 holds the top plate, shutter crate, and body shell together. |
|
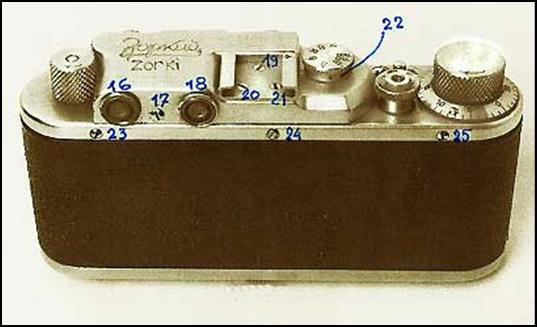
No 17 is a top plate set screw and holds the eyepiece tube in place with some models. No. 16 and 18, the RF and VF eyepieces, respectively, are removed by unscrewing their bezels with a rubber mat or fibre wrench. No. 19, 20, and 21 hold the accessory clip (shoe) in place. No. 22 is the set screw for the shutter speed dial. In some models, there are two set screws. With most Zorki, the shutter dial can be removed by lifting once the set screws are loosened. FED shutter dials are removed by unscrewing the dial. Always set the dial to “B” or some other speed where the set screws are accessible before removing the shutter dial. Nos. 23, 24, and 25 are the three remaining screws which hold the top plate, shutter crate, and body shell together. In some models, there are only two set screws, found in positions 23 and 25. |
|
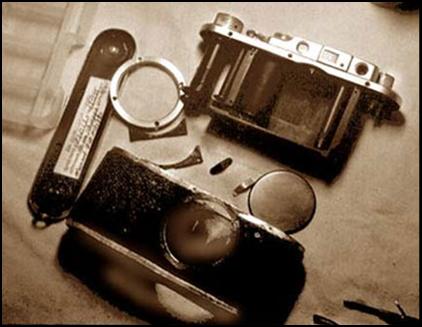
The camera at the initial stage of disassembly. The top plate has not been taken off. All the objects seen here are the parts which will be loose at this stage of disassembly. Aside from the bezels, dials, and set screws, take care not to loose the pressure plate springs (centre) and the lens mount retainers (crescent shaped bars next to lens mount). FED pressure plates are perfectly round and can be installed any way. Zorki pressure plates are „band-aid“ shaped, patterned after the Leica’s. It will install correctly only one way, with its bevelled edge towards the bottom. Protect the pressure plates too from too much mechanical contact.
|
|
Very few tools needed: two micro screwdrivers, small long-nosed pliers (jaws lined with heat-shrink rubber, a spanner or snap-ring wrench (for loosening retainers– don’t use them to take out the rings all the way through), tweezers, and a small rubber mat. This is the first step to access the camera’s innards for cleaning, lubrication, or shutter replacement. |