|
Camera Disassembly page 4 |
|
This is perhaps the most difficult step in the process. Remember, you are attempting to put back not only the shutter crate, but several parts as well. In this step, the coupling pin, the shutter rollers, and the drum should all get in together, correctly, in one stroke. The pin has to go through the shutter drum’s hole correctly. The restricting gear has to engage with the gears of the advance and release mechanisms. The shutter release button itself has a metal spinet with a gear on its end– and this will fall off during the reassembly. Dab it with some grease so it will “stick” into the shutter’s shaft. And then, getting the ends of the spring rollers into their holes at the top plate can be very challenging. BE VERY PATIENT– such is hardly achieved the first time. Many, many attempts may be necessary to get it right. |
|
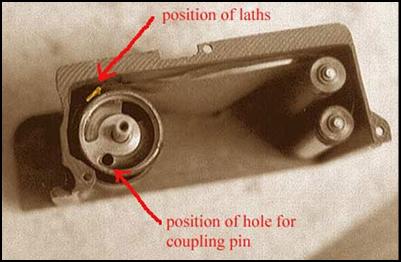
The second (long) curtain is glued to the shutter after being attached to its lath. Its end should be placed exactly where the old one was marked. Its lath is pulled by ribbons attached to the second shutter roller. Reel in both curtains towards the drum so that the laths are placed as shown in the photo below: |
|
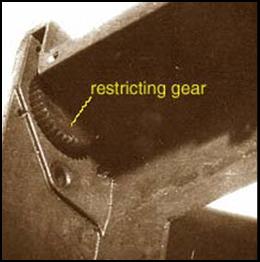
The lath should be at this position. Install the drum into its slot with the restricting gear turned all the way to its rightmost limit(when seen from the top). The coupling hole should be positioned in such a way that when the crate is installed and the coupling pin on the top plate enters it, the pin’s upper arm should point where it was marked prior to disassembly. The restricting gear is found at the bottom left side of the shutter crate, and is the only gear, or part, for that matter left attached to the crate when all the other parts have been removed. Before installing the drum, the restricting gear has to be turned clockwise until it stops and should remain in that position when the shutter drum is replaced. In the left photo, the drum shouldn’t be able to turn clockwise anymore, if the drum was correctly installed in relation to the restricting gear. It should however be able to turn clockwise, with the curtains going to the side of the spring loaded rollers. |
|
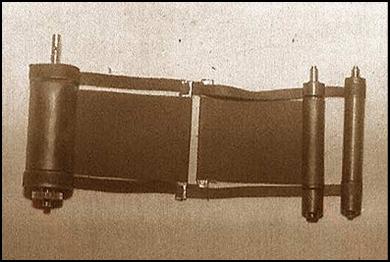
When the curtains and ribbons are completely installed, their positions should look like this. Second curtain goes over the first curtain lath. Ribbons of second curtain go under the rollers of tensioned roller #1, where first curtain is attached. Insert the drums and rollers into the crate in this orientation. |
|
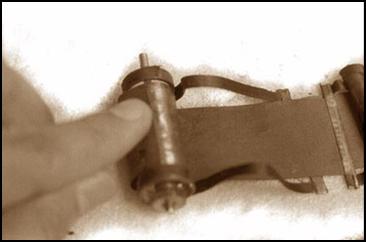
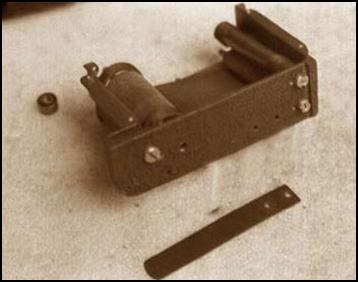
The two shutter rollers (left photo) are installed with their locking nuts. They are not tensed yet at this point.
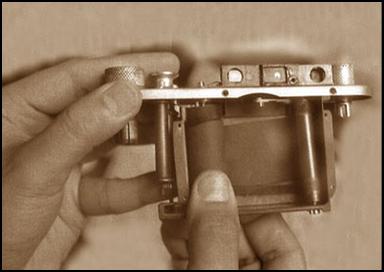
Grip the shutter crate with your right hand, and hold down the shutter drum (with the curtains reeled on it) with your thumb to prevent it from being displaced during reassembly. Hold the upper plate with your left hand and carefully fit the two pieces together. |
|
Lock the rollers with their nuts and replace the lower light baffle which covers the lower part of the shutter. The baffle is clamped in place by the long release spring’s retainer. Putting this back is perhaps the next most difficult step in reassembly. The retainer can be glued to the baffle so it will be in place to receive the long spring’s bolts. |