|
Loading the RUSSIAN DEVELOPING TANK.
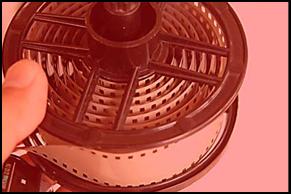
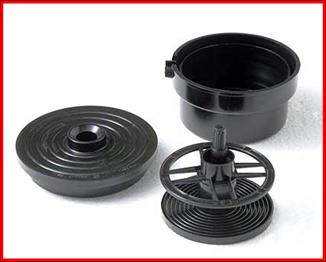
Soviet Tank: Reel, Tank, and Lid.
STEP 1.
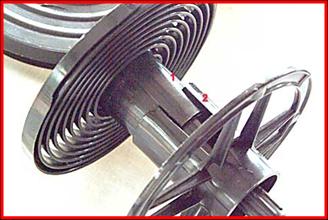
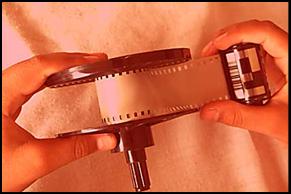
Examine the reel well. It must be dry. There are two parts– the lower grooved flange which holds the stirring rod and upper ‘flat’ flange which has the light-blocking baffle which engages with the tank cover. There is a notch were the two parts join (marked 1 and 2 in the picture) where the tip of the film should be attached. Film to be loaded into the tank need not be cut to a straight edge for tank loading. A bit of the tongue should be retained. Modern film leader tongues can be used as is. NEXT STEPS SHOULD BE DONE IN DARKNESS. (Pink field in pictures indicate action which must be done in absolute darkness).
STEP 2.
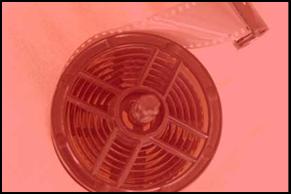
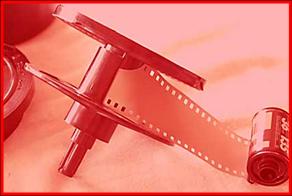
Insert the tip of the film into the slit formed by a partially disassembled reel. The reel should point down (stirring rod pointed downwards) when it is loaded. FILM SHOULD BE LOADED WITH EMULSION SIDE OUT. It will not load properly if the film is fed emulsion side in. Push the reel flanges together and commence loading. If the film leader is long enough and camera loading was done fastidiously (ie, ample leader length given to film before making the first exposures), the film end could probably be inserted into the reel in dim light. STEP 3.
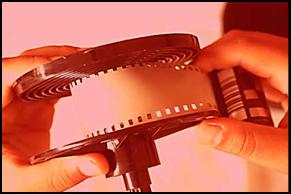
In total darkness, draw out film and load into the tank. The film must not be buckled, as required for loading in metal Nikor-type tanks. Draw film by turning the reel with the left hand. The right hand must hold the cassette. The action of the turning reel is enough to set the film right in the reel. The film’s natural curl serves to keep the surfaces from sticking, and the ‘upper’ flat reel flange holds it down to keep it in place. Continue the drawing action until all of the film is drawn from the cassette.
.
|

|
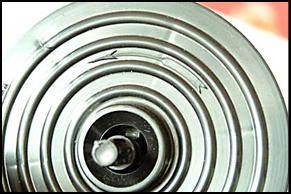
STEP 4.
This is how film properly loaded in the tank should be. Obviously, it is not possible to see this before the film is fully processed. Film surfaces are well separated. Only the bottom grooves guide the film position, and the top flange bears on the entire roll to keep it in place. Tear out the end of the film and reel in its end portion. Place the loaded reel into the tank and replace its cover. Normal Room Lighting can be turned on again to commence processing.
STEP 5.
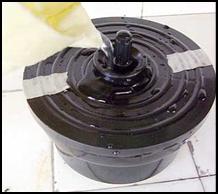
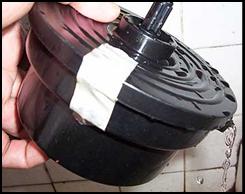
The tank lid is extreme light and held in place by gravity alone. It can easily be displaced and would even float off if there is too much solution in the tank. To avoid this risk, tape the tank lid to keep it in place. Agitating film is by turning the stirring rod COUNTERCLOCKWISE. There is an arrow engraved on the lid to mark this direction. TURNING THE ROD CLOCKWISE CAN CAUSE THE FILM IN THE REEL TO UNRAVEL OR JUMP GROOVES AND RESULT IN STICKING SURFACES. The Tank requires 350 ml of working solution.
Solutions are introduced through the funnel-shaped hole on the lid. This surrounds the reel stirring rod. A tank’s worth of solution takes about 2 minutes to fill. Putting in liquid through the hole can be tricky. A larger funnel can be used to minimise spills. Solutions are drained by tipping the tank (HOLD THE LID IN PLACE CAREFULLY!) to its side. There is a lip-like protrusion on the side where solutions drain out. Draining takes about 2 minutes as well.
|